Support our educational content for free when you buy through links on our site. Learn more
🎓 The 4 Basic Steps in the Teaching Process (2026)

The four basic steps in the teaching process are Preparation, Instruction, Assessment, and Reflection, forming a continuous cycle that turns chaotic lessons into transformative learning experiences. You might wonder, “What are the four basic steps in the teaching process?” and why they matter so much? The answer lies in their ability to create a feedback loop where every student’s struggle becomes a teacher’s guide for the next lesson.
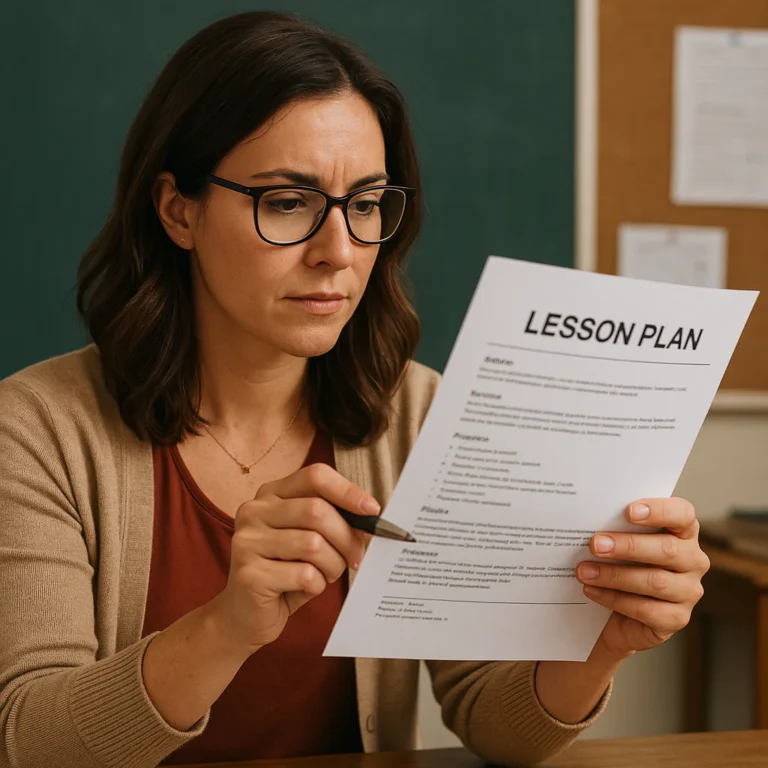
Imagine walking into a classroom with a stack of worksheets and a vague idea of what to do. The result is often a room full of confused faces and a teacher wondering where the time went. Now, picture a teacher who plans a specific objective, delivers it with a hook, checks for understanding in real-time, and then tweaks the next day’s plan based on what they learned. That is the power of this four-step framework.
Did you know that research suggests teachers who engage in regular reflection improve student outcomes by up to 30%? It’s not just about teaching; it’s about evolving your craft. Whether you are a veteran educator or a student teacher, mastering this cycle is the secret sauce to classroom success.
Key Takeaways
- The Cycle is King: The four steps—Preparation, Instruction, Assessment, and Reflection—are not a linear checklist but a continuous loop that drives improvement.
- Assessment is Action: Effective assessment happens during the lesson, not just at the end, allowing for immediate instructional adjustments.
- Reflection Fuels Growth: Skipping the reflection phase means missing the opportunity to turn mistakes into future successes.
- Adaptability Matters: While the steps remain constant, the methods used in each phase must adapt to different age groups and learning styles.
Table of Contents
- ⚡️ Quick Tips and Facts
- 📜 A Brief History of the Teaching Process: From Socrates to Modern Classrooms
- 🧠 The Core Framework: What Are the Four Basic Steps in the Teaching Process?
- 1️⃣ Step One: Preparation and Planning (The Blueprint Phase)
- 2️⃣ Step Two: Instruction and Delivery (The Showtime Moment)
- 3️⃣ Step Three: Assessment and Evaluation (The Reality Check)
- 4️⃣ Step Four: Reflection and Feedback (The Growth Loop)
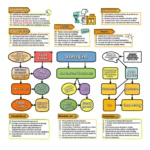
- 🔄 How the Four Steps Interconnect: Creating a Seamless Learning Cycle
- 🛠️ Essential Tools and Resources for Each Teaching Phase
- 🚫 Common Pitfalls: What Happens When You Skip a Step?
- 🎓 Adapting the Four Steps for Different Learning Styles and Age Groups
- 💡 Real-World Case Studies: Teachers Who Mastered the Process
- ❓ Frequently Asked Questions About the Teaching Process
- 🔗 Recommended Links for Further Reading
- 📚 Reference Links and Sources
- 🏁 Conclusion
⚡️ Quick Tips and Facts
Welcome to the Teacher Strategies™ breakdown
of the teaching process! Before we unpack the whole kit and caboodle, here are the essential takeaways for your next faculty
meeting (or your next frantic Sunday night lesson planning session).
- The Four Core Steps: The universally recognized
teaching process consists of Preparation/Planning, Instruction/Delivery, Assessment/Evaluation, and Reflection/Feedback. Think of it
as the “P-I-E-R” method: Plan, Instruct, Evaluate, Reflect.
It’s a Cycle, Not a Line: These steps aren’t a one-and-done checklist. They form
a continuous loop. What you learn in the Reflection phase directly fuels your next Planning phase. It’s the circle of teaching
life! 🦁
- Flexibility is Key: While the framework is simple, its application is an art. Great
teaching involves adapting these steps to different students, subjects, and classroom environments. A rigid approach is a recipe for disengagement.
Assessment Isn’t Just for Grades: Effective assessment happens before, during, and after a lesson. It’
s about gathering data to inform your instruction, not just slapping a letter grade on a paper.
- Technology
is a Tool, Not a Crutch: From planning apps like Planboard to assessment tools like Kahoot!, technology can enhance each step.
But remember, it’s there to support great teaching, not replace it.
| Step | Core Question | Key |
|---|---|---|
| Activity | ||
| 1. Planning | What will they | |
| learn and how? | Setting objectives, choosing materials, designing activities. | |
| 2. Instruction | ||
| How will I teach it? | Lecturing, facilitating discussions, guiding group work. | |
| 3. Assessment | ||
| Did they learn it? | Quizzes, projects, observations, exit tickets. | |
| 4. Reflection | ||
| How can I improve? | Analyzing student data, self-assessing, seeking feedback. |
📜 A Brief History of the Teaching Process: From Socrates to Modern Classrooms

Ever wonder if
Socrates worried about lesson plans? Probably not in the same way we do, with binders and digital templates! But the core
idea of a structured process for imparting knowledge is as old as, well, knowledge itself.
Way back in ancient Greece
, Socrates used a method—the Socratic Method, naturally—that involved a cycle of questioning, listening, and deeper
questioning. Sound familiar? It’s a primitive form of instruction and assessment, all rolled into one. He was assessing
his students’ understanding in real-time and adjusting his “instruction” (his next question) based on their responses. He
was a master of fostering Critical Thinking.
Fast
forward through centuries of one-room schoolhouses, stern lectures, and rote memorization. The 20th century brought
educational theorists like John Dewey, who championed “learning by doing.” This shifted the focus from the teacher as a simple dispenser of facts
to a facilitator of experiences. Dewey’s work laid the groundwork for a more dynamic process involving planning hands-on activities,
guiding students through them, and observing the outcomes.
Today, our understanding of the teaching process is a beautiful mashup of these historical
threads, refined by cognitive science and powered by technology. We’ve moved from a simple “I talk, you listen”
model to a sophisticated, cyclical process that puts the student’s learning journey at the very center.
🧠 The Core Framework: What Are the Four Basic Steps in the Teaching Process?
Alright, let’s
get to the main event. You’ve heard us mention them, but what are the four basic steps?
At Teacher Strategies™, we see them as the four pillars that hold up the entire temple of learning. Get these right, and you
‘re not just teaching; you’re creating an environment where real, lasting learning can happen.
1️⃣ Step One
: Preparation and Planning (The Blueprint Phase)
This is where the magic begins. You wouldn’t build a house without a
blueprint, and you shouldn’t walk into a classroom without a plan. This phase is all about making intentional decisions before you
ever greet your students.
- Identify Your Objectives: What, specifically, do you want your students to know or
be able to do by the end of the lesson? This is your North Star. Much like a researcher must first identify
their topic to avoid aimless work, a teacher must set clear learning goals. As one guide on the research process states,
“Selecting a topic can be the most challenging part of a research assignment.” For us,
defining the objective is that critical first step. - Know Your Audience: Who are your students? What are their
prior knowledge levels, interests, and learning needs? This is where you start thinking about Differentiated Instruction to meet everyone where they are. Are they visual learners? Do
they need hands-on activities? - Gather Your Materials: What resources will you need? Textbooks,
worksheets, lab equipment, online articles, videos? Having everything ready to go prevents a chaotic scramble mid-lesson, which is a cornerstone
of good Classroom Management.
Design the Activities:** How will you get them to the objective? This is the creative part! Will it be a lecture,
a group project, a debate, a gallery walk? You’re scripting the learning journey. An excellent framework to consider here
is the 4 A’s strategy, which helps structure activities for maximum engagement.
✅ Do: Over-plan
! It’s always better to have more activities than you need.
❌ Don’t: “Wing
it.” Even the most experienced teachers rely on a solid plan.
2️⃣ Step Two: Instruction and
Delivery (The Showtime Moment)
This is it. The bell has rung, the students are looking at you (hopefully!), and it’s time to put your plan into action. Delivery is about more than just talking; it’s
about engaging, facilitating, and managing the learning environment.
- Engage from the Start: Kick things off with a
hook! A provocative question, a surprising statistic, a short video, or a quick story can grab their attention and make
them curious. - Vary Your Methods: Don’t be a one-trick pony. Mix it up! A
little direct instruction here, a dash of Collaborative Learning there. Use think-pair-share, jigsaw activities, or station rotations. The more varied the methods, the more students
you’ll reach. - Check for Understanding: Don’t wait until the end of the lesson to find
out who’s lost. Pause frequently. Ask questions. Use quick, informal polls (a thumbs-up/thumbs-down works wonders). This is your in-the-moment, formative assessment. - Be a Facilitator: Your
role isn’t just to be the “sage on the stage.” Be the “guide on the side.” Circulate the
room during group work, listen to conversations, and ask probing questions to push their thinking deeper.
One of our veteran
teachers, Sarah, tells a story about a lesson on fractions that was falling flat. The kids were just staring blankly. She
ditched her planned lecture, grabbed some Hershey’s chocolate bars from her emergency snack drawer, and had them start breaking
the bars into fractions. Suddenly, 1/2 and 1/4 made a lot more sense
. That’s the art of delivery—reading the room and adapting your plan on the fly.
3️⃣ Step
Three: Assessment and Evaluation (The Reality Check)
You’ve planned, you’ve taught, but did it
work? Did the students actually learn anything? Assessment is how you find out. It’s the crucial data-gathering phase
that tells you whether you hit your objectives.
There are two main flavors of assessment:
- Formative Assessment: This
is the ongoing, low-stakes stuff. It’s the check-for-understanding questions, the exit tickets,
the observations you make during group work. The goal here is to get a quick pulse on student learning so you can make
immediate adjustments. - Summative Assessment: This is the more formal, “end-of-unit
” evaluation. Think tests, essays, and final projects. It’s designed to measure what students have learned over a longer
period.
A balanced approach uses both. Relying only on summative tests is like performing an autopsy—it tells you what went
wrong, but the patient is already dead. You need those formative checks to guide your instruction while there’s still time
to make a difference. Explore our resources on Assessment Techniques for more ideas.
4️⃣ Step Four: Reflection and Feedback (The Growth Loop)
The lesson is over, the grades are in the book… but your job isn’t done. This final step is arguably
the most important one for your own professional growth. Reflection is about looking back at the entire process and asking, “How
did it go, and how can I do it better next time?”
- Analyze the Data: Look at the assessment
results. Which concepts did students master? Where did they struggle? Were there any particular questions on the test that tripped everyone up? This
data is gold. - Reflect on Your Practice: Think about your own performance. What parts of the lesson went
really well? What parts felt clunky or confusing? Did you manage your time effectively? Was student engagement high or low?
Seek Feedback: Ask your students what they thought! A simple survey can provide amazing insights. You can also ask a
trusted colleague to observe your class and give you feedback.
- Iterate and Improve: Use all of this information to tweak
your lesson plan for the next time you teach it. This is how good lessons become great lessons.
This four-step process isn
‘t just for K-12. The featured video from StatMed, a service for medical students, highlights a
nearly identical process they use for teaching high-level skills. They call it: dissemination and instruction, guided practice,
independent study, and analysis and feedback. This shows just how fundamental this cycle is to effective teaching
at any level.
🔄 How the Four Steps Interconnect: Creating a Seamless Learning Cycle
It’s tempting
to see these four steps as a linear path: you plan, you teach, you test, you’re done. But
that’s a rookie mistake! The true power of this framework lies in its cyclical nature.
Imagine it like this
:
- Your Reflection on last week’s messy unit on photosynthesis (Step 4) directly
informs your Planning for the upcoming unit on cellular respiration (Step 1). You realize you need more hands-on models
. - During your Instruction (Step 2), you use quick polls (a formative Assessment, Step 3) and notice that half the class is confused about the role of mitochondria.
- You immediately pivot
your lesson plan, breaking them into groups to build a model of a cell. This on-the-fly adjustment is a mini
-cycle of assessment and instruction happening in real-time. - The results of the end-of-unit
test (Summative Assessment, Step 3) show that while they nailed mitochondria, they were shaky on ATP
. That becomes a key point for your final Reflection (Step 4), and you make a note to add
a specific activity about ATP when you Plan (Step 1) this unit next year.
See? It’s
a constant, dynamic loop. Each step flows into the next. As the instructors in the StatMed video
emphasize, you have to work through the process step-by-step to truly master the skills. You can’t just “treat the skills like a buffet where you pick and choose.” The same is true for teaching; skipping a step breaks the cycle and hinders both student learning and your professional growth.
<
a id=”essential-tools-and-resources-for-each-teaching-phase”>
🛠
️ Essential Tools and Resources for Each Teaching Phase
Having a great process is one thing; having the right tools to execute it is
another. Here are some of our team’s favorite resources, broken down by which step of the teaching process they support
.
| Teaching Step | Recommended Tools & Resources | Why We Love Them |
|---|
| 1. Planning | **Canva for Education
**, Google Docs, Planboard | Canva makes creating beautiful, engaging worksheets and presentations a breeze.
Google Docs is the king of collaborative planning with colleagues. Planboard is a fantastic digital planner designed specifically for teachers. |
|
2. Instruction | Google Classroom, Pear Deck, Nearpod | Google
Classroom is a robust hub for distributing materials and assignments. Pear Deck and Nearpod supercharge your presentations, turning them into interactive
experiences that keep students engaged. |
| 3. Assessment | Kahoot!, Google Forms, Socrative | Kahoot! gamifies quizzes, making assessment fun. Google Forms
is incredibly versatile for creating quizzes, exit tickets, and surveys. Socrative offers real-time quizzing and feedback
. |
| 4. Reflection | A simple notebook, **Miro
**, Pineapple Charts | Sometimes the best tool is a pen and paper for jotting down thoughts. Miro is a digital whiteboard
perfect for mind-mapping what worked and what didn’t. Pineapple Charts are a low-tech, high-impact way to
invite colleagues into your room for informal observation and feedback. |
👉 Shop our favorite classroom tech on:
Interactive Displays & Projectors:** Amazon | Walmart
🚫 Common Pitfalls: What Happens When You Skip a Step?
What happens if you cut
corners? Well, let’s just say it’s not pretty. Each step is a load-bearing wall. Take
one out, and the whole structure gets wobbly.
- Skipping Planning: This is the cardinal sin.
Walking in without a plan leads to chaotic, unfocused lessons. You’ll waste time, the students will get bored
or confused, and learning objectives will be missed entirely. It’s a one-way ticket to a Classroom Management nightmare. - Skipping (or Rushing) Instruction: This happens when we’re so focused on “covering the curriculum” that we forget to actually *
teach*. A rushed delivery with no checks for understanding is like showing a movie on fast-forward. The content was technically
“delivered,” but did anyone get it? Nope. - Skipping Assessment: Teaching without assessment is like
trying to drive to a new destination with your eyes closed. You’re moving, but you have no idea if you’
re going in the right direction. You might think your students understand, but you won’t know for sure until it
‘s too late. - Skipping Reflection: This is the most silently dangerous pitfall. If you don
‘t reflect, you don’t grow. You’re doomed to repeat the same mistakes year after year. The
lesson that bombed with your 3rd-period class will bomb again next year unless you take the time to figure out why
it bombed and how to fix it.
🎓 Adapting the Four Steps for Different
Learning Styles and Age Groups
The beauty of the four-step process is its universal applicability. It works for teaching kindergarteners their
ABCs and for training medical students. The what of the process remains the same; the how is
what changes.
-
For Early Elementary (K-2):
-
Planning: Must
be highly structured with short, varied activities. Think 10-15 minute chunks. Incorporate lots of movement
and sensory experiences. -
Instruction: Very hands-on and visual. Use songs, chants, and games
. Direct instruction should be brief and lively. -
Assessment: Mostly observational. Are they participating? Can they demonstrate
the skill? Use simple checklists. -
Reflection: Focus on engagement. Were they happy and involved? Which activities held
their attention the longest? -
For Upper Elementary & Middle School (3-8):
-
Planning
: Start incorporating more group work and project-based learning. Build in choices to give students more autonomy.
Instruction: Balance direct instruction with collaborative tasks. Introduce technology tools for research and creation.
-
Assessment:
A mix of formative (exit tickets, polls) and summative (quizzes, small projects) assessments. Introduce peer feedback
. -
Reflection: Analyze which group dynamics worked best. Did the technology enhance or distract from the learning?
For High School & Adult Learners (9+):
- Planning: Involve the learners in setting
goals. Focus on real-world applications and complex problems. - Instruction: Shift heavily towards facilitation. Use
Socratic seminars, debates, and student-led presentations. - Assessment: Emphasize performance-based tasks
, essays, and detailed rubrics. Self-assessment becomes a key component. - Reflection: Focus
on higher-order thinking. Did the lesson challenge their assumptions? Did it foster genuine Critical Thinking?
This process is distinct from highly regulated procedures like the
10-step special education process outlined by IDEA, which has strict legal timelines for evaluation and IEP development. While that process also involves identification, evaluation, and planning, our four-step teaching cycle is a pedagogical framework for day
-to-day instruction, adaptable to any learner.
💡 Real-World Case Studies: Teachers Who Mastered the
Process
Let’s move from theory to practice. We’ve seen these steps transform classrooms.
Case Study
1: Mr. David’s Flipped History Class
David was struggling with his 10th-
grade World History class. His lectures were met with yawns and glazed-over eyes. He decided to flip the script using
the four-step process.
- Planning: He recorded his lectures as short videos for students to watch for
homework. His in-class plan now focused entirely on activities: debates, primary source analysis, and map-making challenges
. - Instruction: Class time was no longer him talking at them. It was him facilitating, moving
from group to group, asking probing questions, and clarifying misconceptions. - Assessment: He used quick Google Form
quizzes to check if they watched the videos. In-class, his assessments were the products of their work: the quality of their debate
arguments, the depth of their source analysis. - Reflection: David realized his students were far more engaged.
The test scores went up, but more importantly, the quality of class discussion skyrocketed. He reflected that giving up the “sage
on the stage” role was scary, but it empowered his students to take ownership of their learning.
Case Study 2
: Ms. Chen’s Kindergarten Reading Groups
Jasmine Chen needed a better way to handle the wide range of reading
abilities in her kindergarten class.
- Planning: She used initial reading assessments to create three flexible reading groups. She
planned different activities for each group based on their specific needs: one group worked on letter sounds with magnetic letters, another on
sight words with flashcards, and a third on reading simple sentences from a book. - Instruction: She
rotated between the groups, providing 15 minutes of targeted, small-group instruction to each, while the other groups worked
on independent literacy centers. - Assessment: Her assessment was constant and informal. She kept a clipboard with a
checklist for each student, noting their progress on specific skills during their small-group time. - Reflection: By
reflecting on her daily notes, Jasmine could see exactly which students were ready to move to a different group and which skills needed reinforcement
for the whole class. This cyclical process of planning, teaching, and assessing in small groups allowed her to perfectly execute Differentiated Instruction.
These teachers aren’t superheroes
. They are just practitioners who intentionally and consistently apply the four basic steps of the teaching process to create amazing learning experiences.
And you can, too! But what questions are still lingering in your mind? Let’s tackle some of the most common ones we
hear.